Thursday, 25 February 2016

More Bisque-Fired Organic Pieces

More pieces are coming out of the kiln now - a couple more bisque-fired pieces on the underwater/organic theme.

I've been making and building these pieces without much planning - for each one, taking a hump-moulded base and then working with its size and shape to create the final forms. It's been successful so far.

The first piece is based on anemone-type forms, the base had a flattened top which lent itself to having a different surface and texture to the sides. I used balls of clay on the top, flattened and then poked with a crochet needle. I'd seen surface forms like this on some corals. The end result is part sunflower, part anemone.

Anemone-1 at the drying stage

Anemone-1 bisque-fired
This piece has a hole so it can be wall-hung. It's about 20cm across and 12 cm high.

The second piece was much more of a surprise. I started off with a basic egg-shape formed from two moulded halves. I knew I wanted to create a form that had many fingers or tentacles all over it. What I didn't realise was that as I applied the tentacles to the form, it would change its shape as it was only part-dried. I think this made the final shape more interesting. The effect is part pine-cone, part pangolin, part coral.

Egg-coral at the drying stage
Egg-coral - bisque-fired
I'm not sure on glazes yet. I am thinking of a plainer white glaze with oxide stain highlights for the anemone, and a plain blue or pink for the egg-coral.

Sunday, 21 February 2016

New home, new studio and a fresh start

I knew it had been some time since I last wrote about the pieces I had been working on, but when I came face-to-face with my last blog post I was surprised to see that it was almost two years ago I last blogged here!

A lot has happened in those two years, we've moved home, I had to set up my studio from scratch, dealt with my studio space consistently flooding (we've had an especially wet year and our property is very exposed to the elements; wind, rain, sleet, salt air...

After a struggle to set myself back up again and to get going, some new work is finally coming out of the kiln.

My favourite finished piece is another inspired by scuba diving and has influences from the coral, anemones, sponges and sea-urchins I've photographed.
   It's a stoneware piece; hand-built, glazed simply with an opaque matt stoneware glaze, highlighted with copper oxide stain and antique pink glass. It's about 30cm (12 inches) across and I've purposely used stoneware so that this piece can be wall hung outside.

Greenware coral-inspired piece Greenware coral-inspired piece on my new whirler!
Greenware coral-inspired piece on my new whirler!
Greenware coral-inspired piece seen from above
The basic shape for this piece is a dome, shaped using a negative plaster mould, the extra bits are.. ah well that's my secret! I rolled the clay slabs between pieces of sandpaper to attempt to give a grainy 'cellular' look to the tentacles, but the thick glaze made it impossible to see that in the final piece.

Bisque-fired coral-inspired piece with copper oxide stain accents
The tentacles retained their grainy texture during the biscuit firing. Here you can see the touches of copper oxide stain I've applied and its ready for the glaze to be poured over.

The glazed piece positioned in the kiln
Once glazed, I used glass nippers to break fragments of antique pink glass and then put the shard of glass inside the tentacles, where they would melt into glass pools. The glaze I used was a ready-made powder from Potterycrafts - P2227, the test tile for which (with copper oxide stain) can be seen here.

I was pleased with the final piece. The thinner rolled slabs for the added tentacles, the new shapes and the subtle colouring of the glass contrasting with the stain gives it a more sophisticated look.

The finished piece - wall-hanging
The finished piece - detail of melted glass
The finished piece
The finished piece

Tuesday, 6 May 2014

Floral (dahlia) inspired stoneware garden pieces

And here are the finished fired pieces that I was glazing at the weekend. Unfortunately they are not good enough to be able to sell, some cracks and bits fallen off (which are disguised in the photos!) But they are good enough as prototypes now I have worked out the best way to build them so they hold up during the firing processes.

Here's the one with aqua-blue glass detail...

Ceramic stoneware floral decorative piece with aqua blue glass
Ceramic stoneware floral decorative piece with aqua blue glass - detail
And the 'antique' pink one...

Ceramic stoneware floral decorative piece with pink glass
Ceramic stoneware floral decorative piece with pink glass - detail
And finally here's some detail of the glaze - taken with my squidcam macro lens. The glaze reacts well with this clay and shows some of the buff colour and reacts with the iron(?) in the grog to give a speckled effect. It also shows a delicate crackle when seen close up.

Semi-opaque off white glaze on grogged crank clay
Semi-opaque off white glaze (Potterycrafts P227) on grogged crank clay


Monday, 5 May 2014

Glazing floral inspired stoneware garden pieces

We're going to be moving house soon, which has given me the impetus to finish some of the pieces I have been working on so they are less delicate and more easily transportable. This also means I can photograph them and get them on my Etsy shop too.

I've had two large floral stoneware pieces hanging around in the 'in progress' shelf for some time now - no excuse for them not being finished other than laziness. So today I had a day to myself and prepared these to and some test tiles for a stoneware firing.

I'd previous glazed a similar earthenware piece in a shiny white glaze, but wasn't really happy with the finish. I knew I'd be able to glaze these two in a more subtle glaze.

Here's the first one (an identical form to the earthenware one) being glazed - pouring the glaze over it over a large bowl.

Glazing a stoneware floral piece with P2227
The glaze I am using is P2227 from Potterycrafts. This has a nice subtle semi-opaque off-white quality that works well with the glass. I'd used this before on a prototype piece but was keen to try it was a different glass colour.

Once the glaze has dried there is a lot of touching up to do by hand as the pouring method doesn't cover every part of the piece. Luckily the glaze is quite forgiving and tends to even itself out where application is not even, and will show interesting variations in opacity rather than highlighting drips and edges. After that is complete I upturn the piece and wipe excess glaze from the base before returning it upright and adding the glass. I use glass nibblers to cut pieces of glass from a sheet and drop them into the petals. During the firing the glass melts and flows so its not necessary to be too neat.

The second piece with  'antique' pink glass. The piece is more sunflower or daisy-like.

Glazed stoneware floral piece with pink glass highlights
I've finally worked out that the easiest and safest way to get these into the kiln is to add the glass with the piece on the kiln shelf, so I can just lower each shelf into the kiln rather than handling the piece itself. Much easier!

Glazed stoneware floral piece with aqua-blue glass highlights
There are being fired to:

  1. Up to 600ºc at 150ºc per hour
  2. 600ºc to 1260ºc at full ramp
  3. No soak
  4. Cool down
The kiln is cooling down right now but they will be out in the morning! Watch this space.

Sunday, 4 May 2014

Ceramic herb markers - an easy process to repeat

Being my most popular item on my Etsy shop (not exactly a lot of competition there though) I decided to start producing these markers on a larger scale, and attempt to fire a whole kiln full in one go. So I got to work creating as many markers as I could to fill the kiln.

Here's the first six sets drying on a plaster bat.

Stoneware herb markers at 'leather hard' stage
Here's how I create the markers (mostly written for me to refer to in the future). I roll out the slab to a depth of 6mm, using wooden beading to get the correct thickness. Each marker is based on a 13cm long strip, which is cut using the width of the wooden beading (approx. 3cm). The tip of each marker is then cut to a point with a wet blade. I've found that the wet (clean) blade makes a much smoother and easier cut that a dry blade. I use an old kitchen knife for this. Oh and the clay I'm using is crank (stoneware) which is grogged and gives the markers a nice grainy rustic appearance.

I then use hot metal type to imprint the lettering. For these I use 48pt perpetua lowercase. I imprint the whole word (or as much as possible with one of each letter) in one go -  this keeps it a bit neater and stops individual letters being 'squashed out' by the next letter. I find that leaving the markers to part-dry on the plaster bat gives a cleaner and neater imprint. If the clay is too wet it can stick to the lettering, or even come off in the enclosed bits of the characters (e.g. in the 'o', 'p', 'b' etc.)

Once the markers are completely dry they are bisque fired:

  1. Up to 600ºc at 150ºc per hour
  2. From 600c to 950ºc at full ramp
  3. Cool down

With just four shelves in the kiln I managed to get thirteen sets of five markers in the kiln.

The next stage is to apply the stain to the lettering. For this I use copper oxide powder mixed with water, just a tiny amount to get the powder into a suspension so I can pick it up with a watercolour brush. I apply this to the indented lettering allowing it to pool in the letters but not worrying too much if it gets on the surface of the marker.

Here's what they look like at this stage

Stoneware herb markers - bisque fired with copper oxide stain applied
The next step is the wipe the excess oxide off the surface. This is best done with a moist (clean) sponge. The bisque fired clay will try to absorb the oxide, so its best to wipe this off with one clean stroke, I've found that pushing the sponge onto the surface to release a small amount of water 'pushes' the oxide into the lettering and then the rest wipes away easily.

Finally the glaze is applied. I've switched to using P2227 from Potterycrafts. It's semi-opaque and works well with the stain and also gives the clay a speckled 'oatmeal' appearance. I dip the upper side of each marker into a shallow tray of glaze, wait for it to dry then wipe any excess from the underside so it doesn't stick to the kiln shelf. This glaze doesn't run so you don't need to worry about leaving too much of a gap between the glaze and the bottom.

I place these directly on a (batt-washed) kiln shelf and fire them:
  1. Up to 600ºc at 150ºc per hour
  2. From 600c to 1260ºc at full ramp
  3. No soak
  4. Cool down
Results and photos of the finished markers in a follow-on blog post.

Saturday, 19 April 2014

Throwing with porcelain - nine rice bowls - bisque fired

The latest batch of thrown porcelain bowls made it out of the kiln this weekend. And the results were pretty good.

Here are the nine surviving bowls dried to the 'greenware' stage. At this point I havent finished off the rims of the bowls so they look pretty rough.

Nine thrown porcelain bowls - greenware
Having smoothed the rims with my trusty fabric board, the bowls look a lot neater but still retain the quirkiness they get from being hand-thrown and all slightly (and some not-so-slightly) different.

Nine thrown porcelain bowls - greenware - with trimmed rims
I fired these to low bisque:

  1. 0°c to 600°c @max 150°c per hour
  2. 600c to 950c at full ramp
  3. Cool down.
And here's the results - nine porcelain bowls ready to be glazed. In the background you can see the fabric board used to finish the bowl rims.

Nine thrown porcelain bowls - bisque fired.

Tuesday, 8 April 2014

Throwing with porcelain again - what a difference a lunch break makes!

A new batch (well just one bag actually) of porcelain arrived last week. I'm trying not to over-order on materials as we could be moving in the next couple of months. I've been working on a project to create some rice bowls for a friend, and its been a path of experimentation into unchartered territory with porcelain and crystalline glazes, but I've learned loads along the way. Anyway I digress...

The glaze is sorted, all I need is some well-formed bowls to put it on! As shown in my previous post, throwing is still an unpredictable event for me, especially with porcelain, which I actually now love throwing with.

I started this morning by experimenting with different weights of clay to get the perfect bowl size. I tried 400g, 350g and 300g. 350g seems about right to be able to get a bowl that fits into your hand comfortably.  So far so good.

I managed 9 bowls in one 90 minute session this morning, 10 minutes per bowl to prepare the clay and throw each one. Not bad.  Here's the results of the morning session...

9 small porcelain bowls, freshly thrown

Then I stopped for lunch. Things didn't go so well after lunch, no idea why, was I getting lazy complacent after throwing 8 good bowls in the morning?

Three bowls in the afternoon were so bad they went straight into the bucket.  One had a hole in the bottom but I kept it anyway. 12 passable bowls in all from a total of 150 mins work.

15 small thrown porcelain bowls, 11 acceptable standard

Monday, 24 February 2014

Throwing - it's like riding a bike (or is it?)

Some days I just struggle with throwing. I don't know why - if I have to be in the right frame of mind, concentration at the right level, pure luck, practice, right weather conditions or some other black magic.

It's apparently not like riding a bike - although I do cycle every day but don't throw every day. If I cycled like I throw some days I'd be broken and bruised.

Anyway here are the pitiful offerings I have to show for a throwing session at the weekend. Porcelain again, which I'd been OK at previously.

Some shoddy attempt at throwing porcelain
Some shoddy attempt at throwing porcelain - ha!
If I'm honest I don't think I prepared the clay well enough - possibly it had started to dry out a bit or affected by sub-zero temperatures as it felt uneven as I was throwing it, and lumps seemed to appear in the walls of the bowls.

Well its all practice, and reclaimable clay. Gotta take the rough with the smooth.

Coral-inspired bowl - all out in one piece (almost)

I held my breath as I opened the kiln half-expecting to see a pile of ceramics sticks on each kiln shelf, but amazingly, each one of these three pieces has survived.

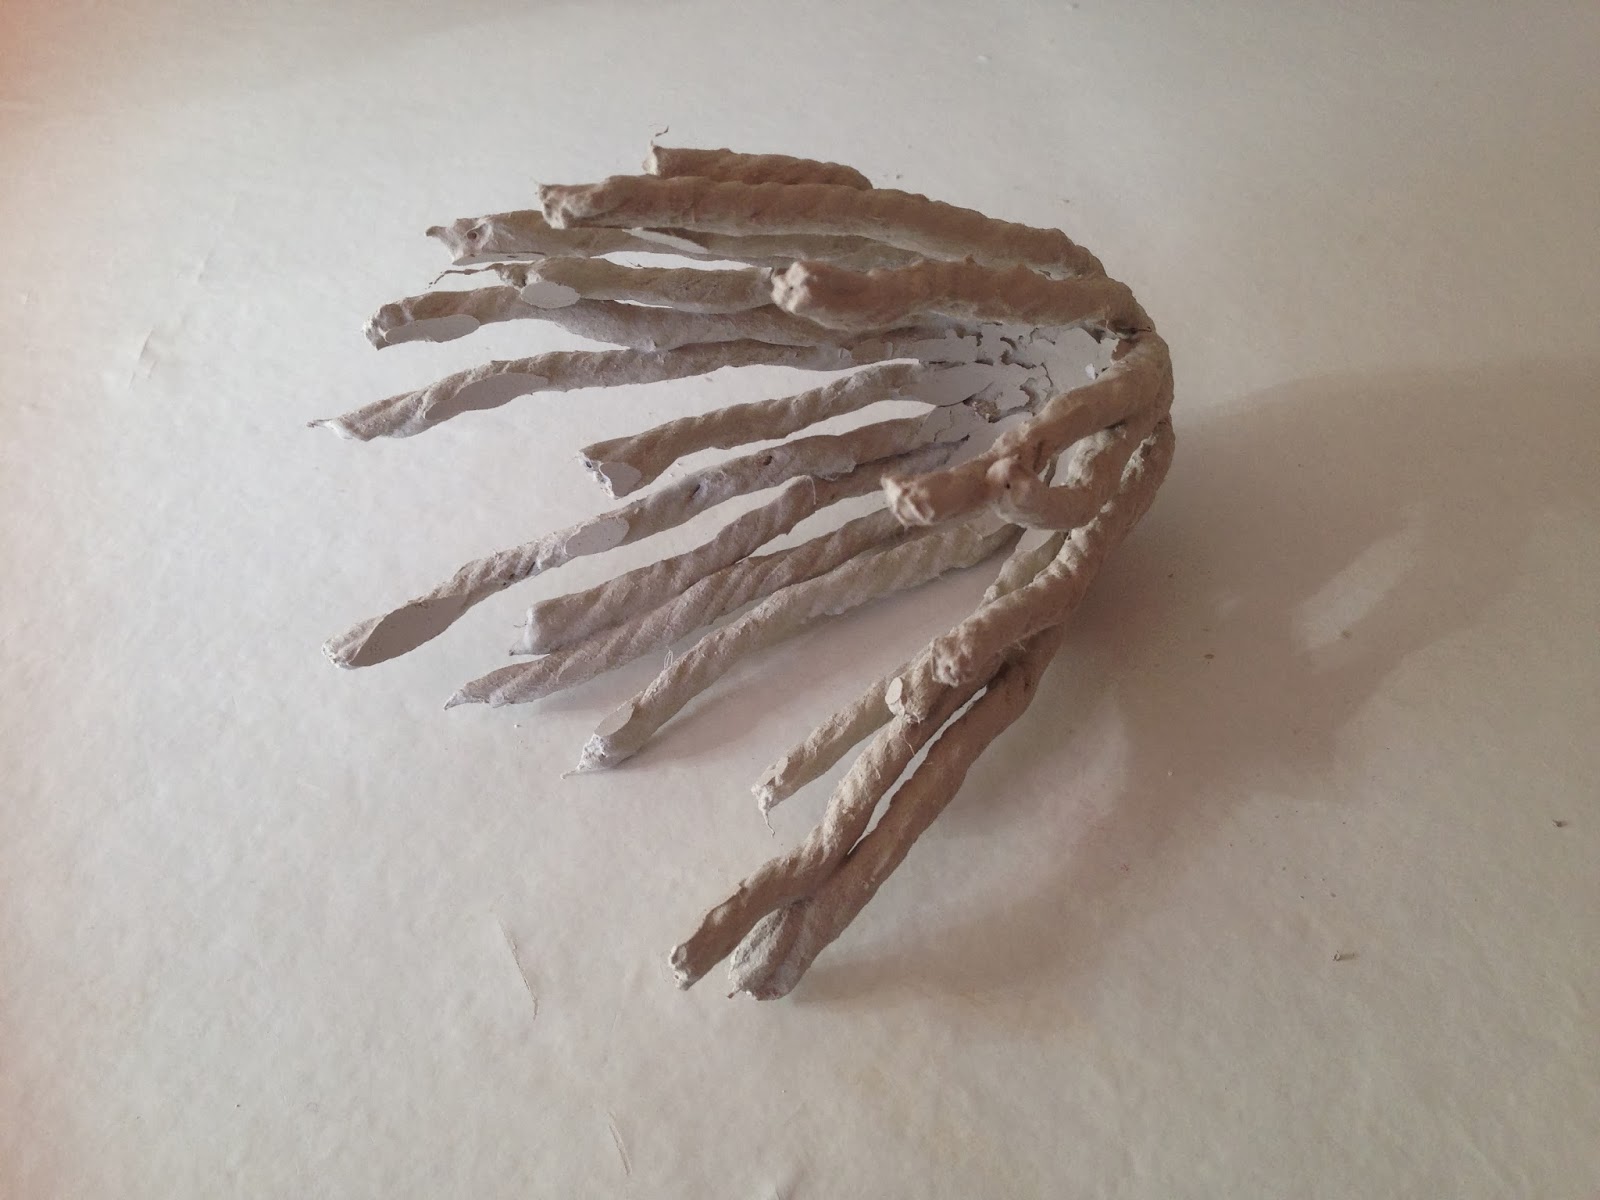
The most delicate was the small random piece, one 'tentacle' broke off immediately on my picking it up out of the kiln - this is probably because none of the tentacles are connected and each one individually is very fragile. This was confirmed by checking the broken piece to find out that the inside of the tentacle was actually hollow - so the slip hadn't really permeated into the string when it was cast.

Coral-inspired tentacle piece - bisque fired
The shallow bowl also survives and felt pretty sturdy (but light) when lifted so there's probably an element of hollowness to it as well.

Coral-inspired flat dish bisque-fired
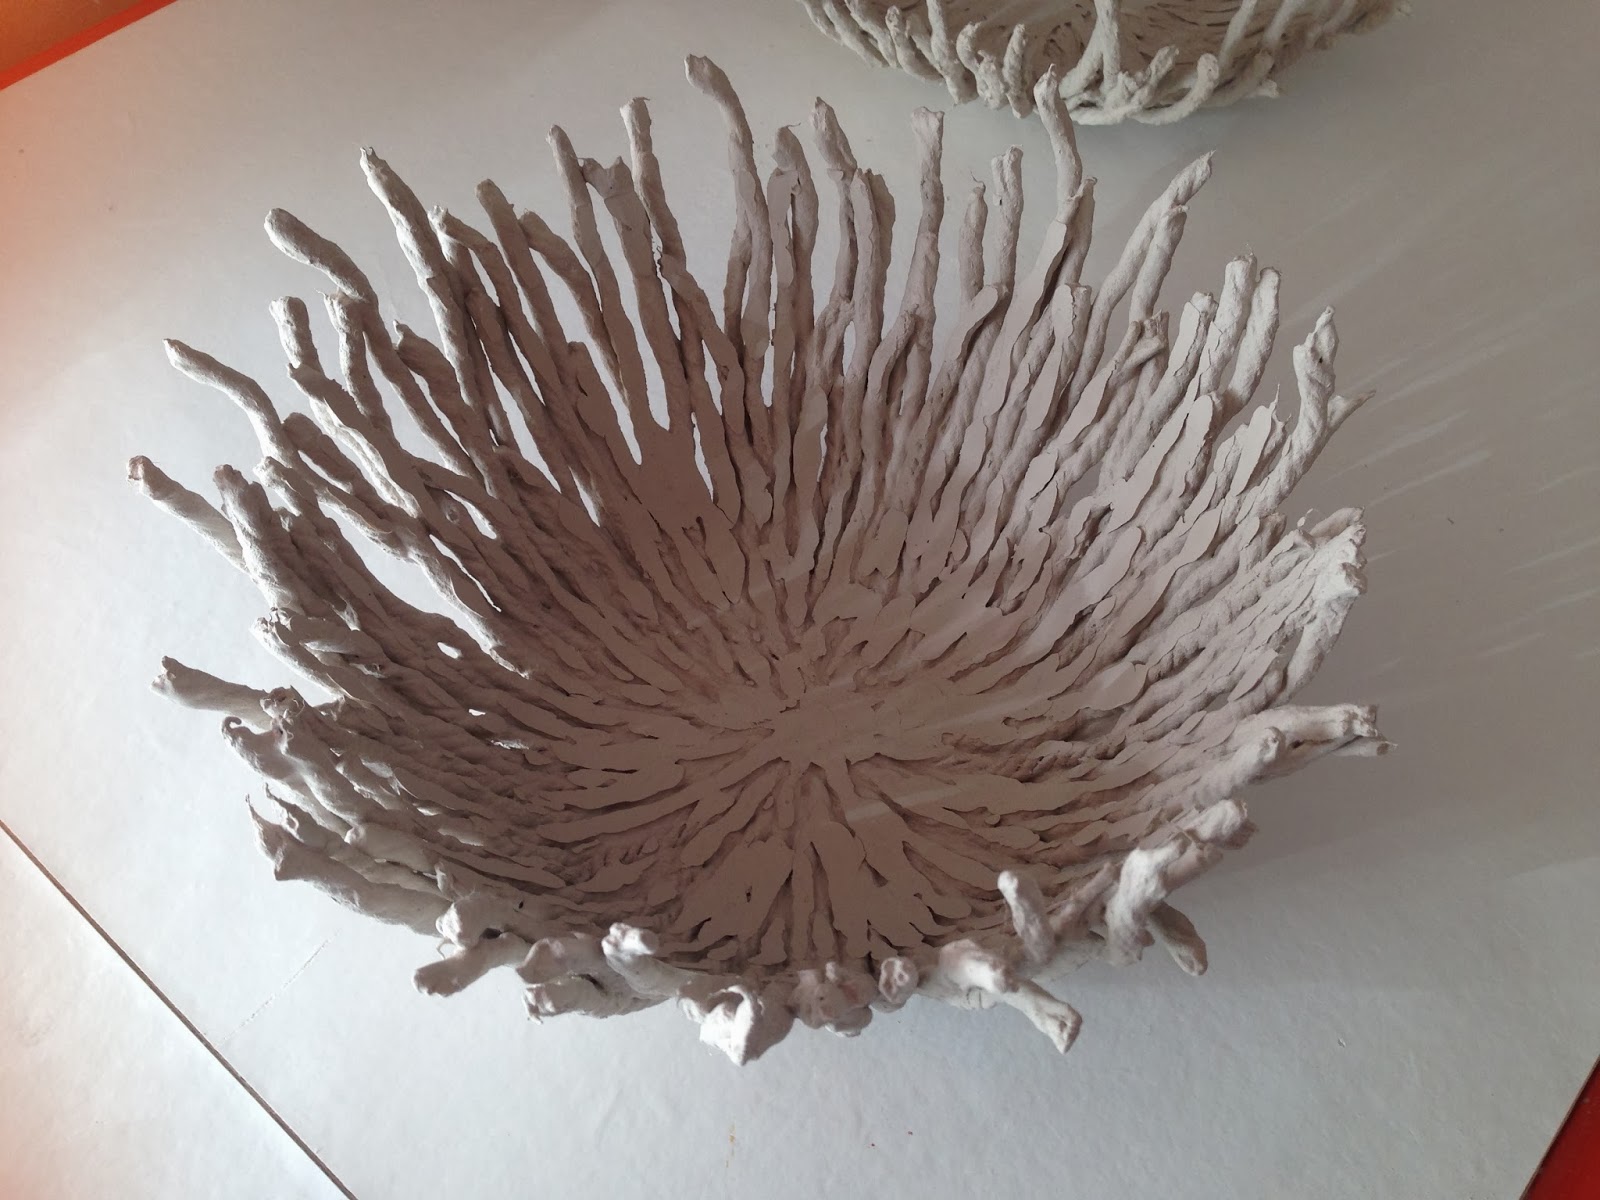
And the large bowl also came out in one piece. Result!

Coral-inspired medium bowl bisque-fired
Next step is to glaze them gently for the final firing. Here's a closer view of the texture on the outside of the pieces.

Coral-inspired medium bowl bisque-fired (side view)

Sunday, 23 February 2014

Further experiments with coral-inspired bowls

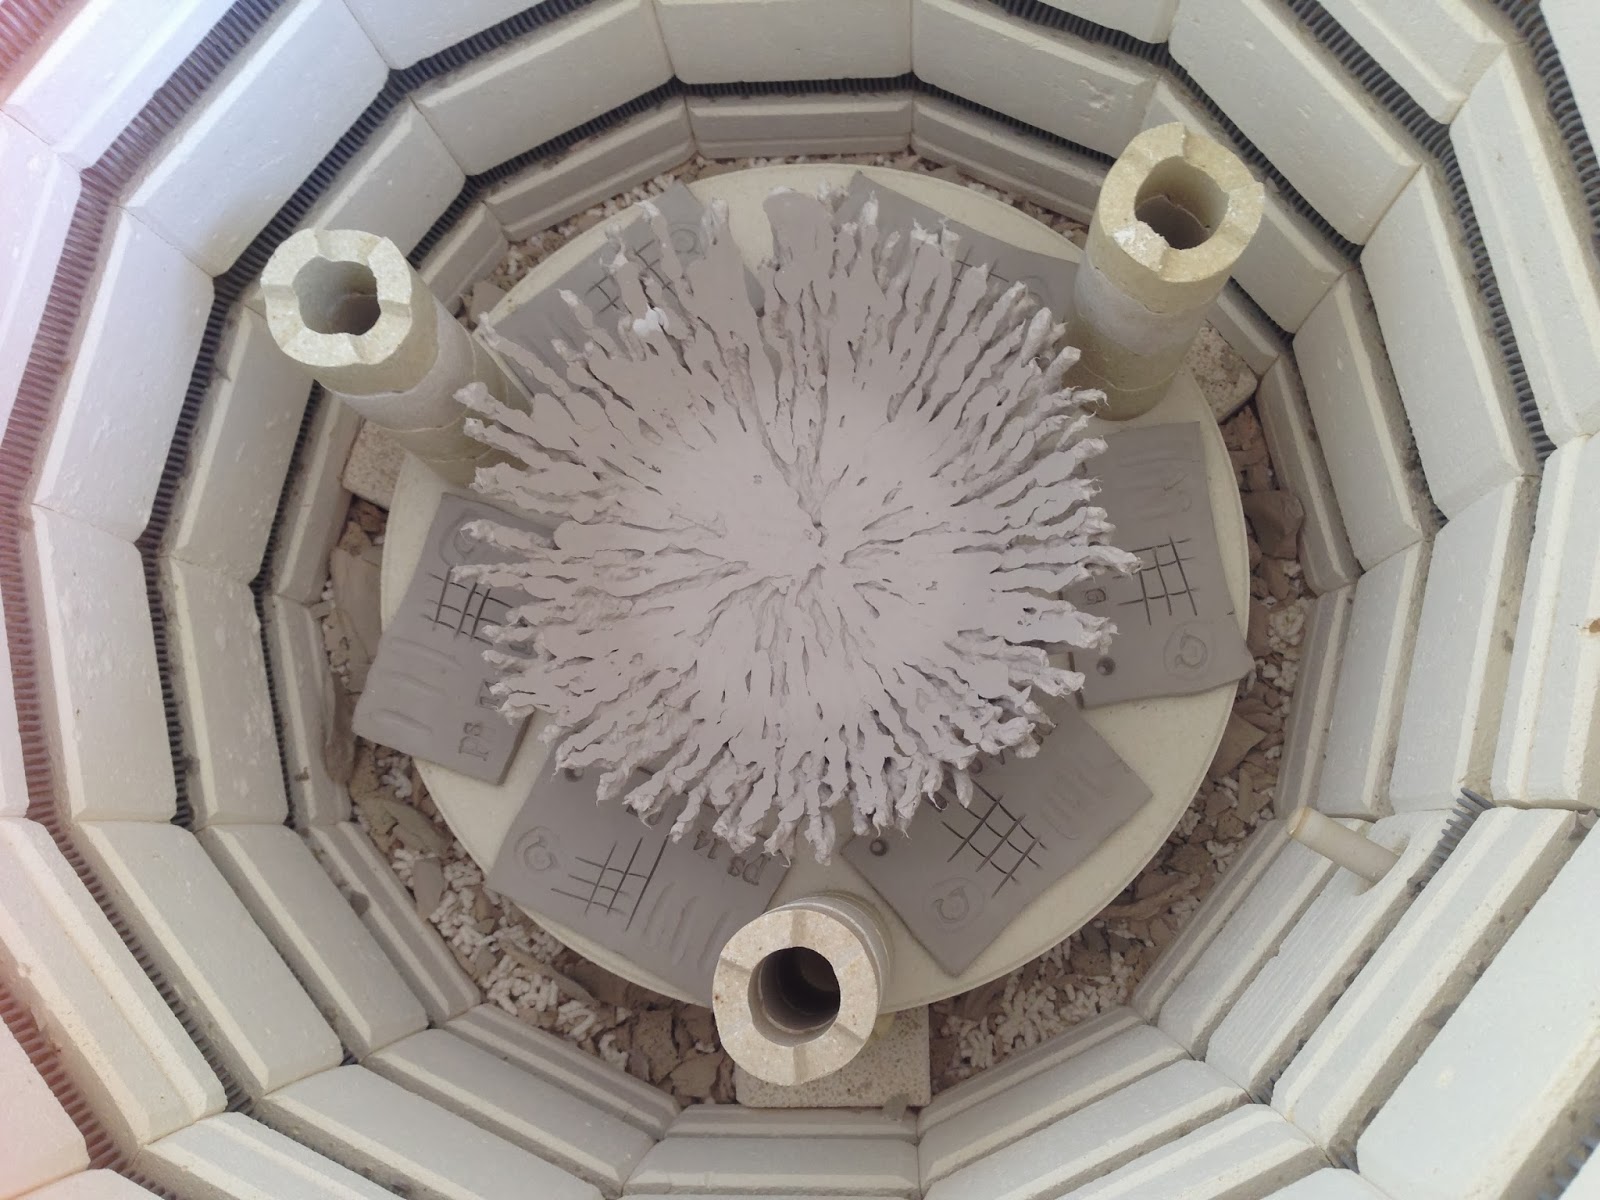
I've just loaded the kiln with these bowls - some more attempts in a variety of sizes and shapes based on the method originally devised to create the bowls. Also some test tiles went in so that I can try out mixing up a wider range of volcanic glazes using silicon carbide.

Top-loading kiln with coral bowl and earthenware test tiles
Even though the end result is beautiful, the pieces are fragile and often break during the making process so I have been experimenting with different methods to strengthen the pieces enough to be able to handle them (gently) without them breaking.

Today three pieces went in - one large bowl, a large disk and a smaller 'random piece. These were cast over some new plaster moulds I made by filling various found plastic containers.

The kiln programme for the bisque firing was:

  1. Up to 600ºC at 150ºC per hour
  2. Full power up to 1120ºC
  3. No soak
  4. Cool down

Here are the three greenware pieces:

Small coral inspired random piece - greenware

Large coral inspired flat bowl - greenware

Large coral inspired rounded bowl - greenware

With last bowl I made I experimented with glazing and firing the greenware in one go - including adding a double layer of glaze for strength. This time I have layered the 'fingers' of the bowl more densely and allowed more slip (petra smooth) to soak into the string without squeezing so much out again.

The results will be evident when these come out of the kiln later. Previous attempts have shown that some of the pieces were so fragile they didn't even survive the bisque firing.

The firing also contained a number of petra smooth test tiles.

Thursday, 19 September 2013

First attempt at throwing with porcelain - disaster or first tiny step?

I had a go at throwing with porcelain today - and what a shock I got! I thought I'd got fairly competent at throwing, earthenware, heavily grogged crank - I stuck to what I knew. But oh my goodness what an eye-opener it was to have a go with porcelain.

Of course I had a quick read-up of some tips before I started - don't overwork it - be careful of 'flopping' use minimal water etc. Of course my first attempt was a disaster - I was treating it as if it were white earthenware - the first 'bowl' flopped into a sort of shallow dish and the next three bowls wibbled and wobbled shamelessly. By attempt number five I was starting to adjust my technique - throw as quickly and as simply as possible - minimal water - using slip or slops of clay to keep the pot from sticking to my hands - throwing a basic cylinder then turning that into a bowl with the minimum of work. Still not a great result but I feel like I have progressed.

Can anyone else remember their first attempt at throwing with porcelain or does anyone have any tips for a newbie?

First attempts at throwing with porcelain
First attempts at throwing with porcelain - ouch!

I'm a bit embarrassed to post this photo - I can throw honestly! Note the flopped 'pot' at the back. None of them are great and I didn't seem to improve much after the second pot. Early days - back to the wheel at the weekend!

Monday, 26 August 2013

My shop on Etsy is now open!

I've finally opened my shop on Etsy. I've listed a few of my 'bread-and-butter' items that are in stock or can be made to order. I'll be adding more items as I photograph them. You can visit my shop from the thumbnails at the top right of this blog post (if you are viewing the web version) or at:

Please let me know if you have any feedback or comments!

Saturday, 24 August 2013

Some new glass colours to experiment with

I love using glass in my ceramic pieces. I love it for its translucent fluid qualities, the way it crackles and crazes in the kiln. It can add a focal point of interest to an otherwise subtle piece and of course the colours are clear and true.

A friend has asked me to make egg cups for her and her two daughters - the colour requests were quite specific! So that was an excuse to put in an order for some more glass...

Coloured sheet glass from the Create Glass Guild - aqua, pale purple and orange

I've used the aqua before in the floral piece earlier on in my blog. Some exciting colours to start playing with - watch this space!

I get all my glass from the Creative Glass Guild - excellent service and delivery is really speedy.

A very happy accident!

Sometimes something amazing happens when you experiment and when the unexpected turns out well, it makes the failed attempts worthwhile.

It's all about learning that failure is part of success...

I created this slip-cast piece as an experiment to try out a new glaze I'd made up which was emerald green. What came out of the kiln first time round was particularly underwhelming, and made its way into my (ever growing) box of rejects.

Then a week or so ago when I was preparing a stoneware glaze firing I realised I had some space in the kiln. I decided to try to breathe life into a couple of 'dead' pieces - nothing to lose there. So I reglazed this and one other bowl with a white over the green. I could never have predicted the result...

Stoneware slip-cast bowl twice glazed white and emerald green

Stoneware slip-cast bowl twice glazed white and emerald green - detail
It looks best when viewed directly from above...

Stoneware slip-cast bowl twice glazed white and emerald green

As I can easily reproduce this effect now, this is going into my soon-to-be opened Etsy shop.


Monday, 15 July 2013

Dahlia inspired earthenware piece - finished!

And here is is - survived the glaze firing in one piece, not stuck to the kiln shelf, didn't collapse, the glass stayed in the petals and didn't dribble out. Fluke or am I actually getting the hang of this now?

These are the photos I took this morning while the glass was still making a 'pinging' noise this morning while it cooled down from about 60 degrees. Its 30cm across and only just fits in my small kiln - heat resistant gloves and lots of care required to get it out.

Better photos to follow - and yes I will be trying to sell these!

Dahlia inspired white glazed earthenware piece

Dahlia inspired white glazed earthenware piece - close-up

Sunday, 14 July 2013

Dahlia inspired earthenware decorative piece

This floral inspired piece went into the kiln this afternoon. My sweat was dripping in the kiln as I was loading it its so hot today!


Its my second attempt at a piece of this type with some lessons learned (like making the base thicker to support the weight of the petals when firing). We'll see how this turns out in the morning!


Wednesday, 19 June 2013

First experiments with lettering using hot metal type

Been playing around with some hot metal type and experimenting with glazing inside the lettering. I am very pleased with the results. Will glaze over these with white and see how they turn out!

Lettering on petra smooth using 48pt perpetua hot metal type

I just created my very own glaze!

Just started experimenting with glaze raw materials. This is my first success! A nice crackle with an interesting volcanic effect when thick.

'Secret recipe' low temp. glaze on petra smooth

Sunday, 17 February 2013

Firing slip-soaked string cast vessels

Today I fired the slip-soaked string experiments I created recently. This is the second batch of experiments using slip-soaked string, the slip being made from a bucket of mixed reclaimed clay - crank, white raku and petra. The first batch were made using slip that was far too thick and the texture of the string was hardly discernable so for this firing I was less generous with a thinner slip which made for more delicate pieces.

The kiln was fired to 1000 degrees as the bisque firing temperature, going up to 500 degrees at 100 degrees per hour, held there for 30 minutes then up to full temperature and again held there for 30 minutes.

Three of the four string pieces survived the firing intact, the largest and most fragile piece lost some of its 'tentacles' during the firing and more fell off while retrieving it from the kiln. Of the three that survived intact, the most delicate lost one appendage after being taken out - the other two (having layered string) were more sturdy and though very light have not broken.

Next step is to glaze them - I have mixed a blue-green volcanic glaze I have used previously and will try it on the test tiles (petra smooth) that were also in this firing.

So some success and some learnings too - thats why I love experimenting!